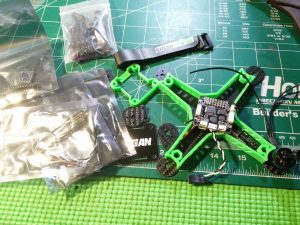
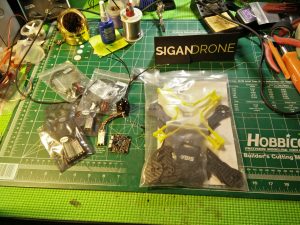
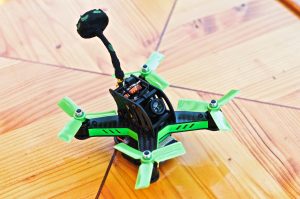
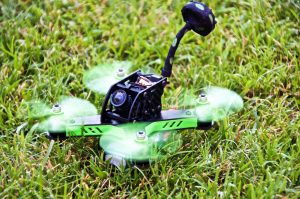
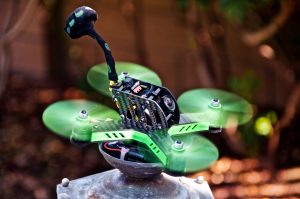
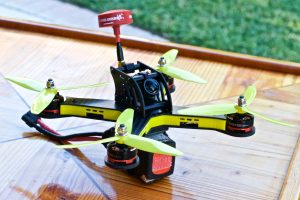
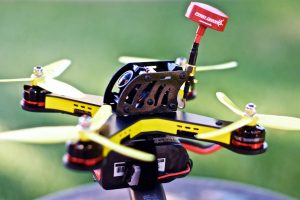
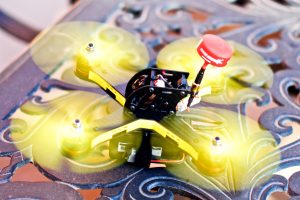
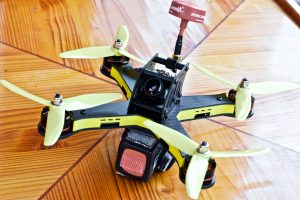
For some time now I’ve been wanting to build a Sigan quad. The clean features and protective enclosure were quite appealing. Confessing, I felt a bit intimidated by these advanced builds. However, with few quads under my belt, it was time to step up. So I ended up building two Sigans: X140 micro and the proper 5″ X190
Frames
The frames come as a kit, with PDB and XT60 connector. There is a diagram for reference and instructions on how to put it together. I highly recommend watching the video from Francis Marasigan (the frame designer) – https://www.youtube.com/watch?v=2lF0xLPDilI. It contains techniques and tips that will help avoid the major pitfalls.
Out of the box, the plate and parts might appear a bit bendy, but assembled, with the included stiffeners, the frame is very sturdy, as stiff as any 4mm I’ve handled.
I completed the X140 first. The X190 afterwards felt much easier.
Parts List
Common on both:
- Flight Controller: SPRacingF3 with Betaflight 3.0
- FPV Camera: Foxeer HS1190 with VBAT OSD
X140:
- Motors: RCX H1407 3800KV
- ESCs: LittleBee 20A-S with BLHeli_S
- Radio: Furious Mini RX for Frsky
- VTX: Eachine ET600
X190:
- Motors: RCX SE2205 2700KV
- ESCs: DYS XS20A with BLHeli_S 14.8
- Radio: FrSky XSR (sbus)
- Video TX: TBS UNIFY PRO 5G8
Build
PDB, Motors, ESCs
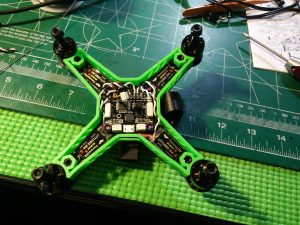
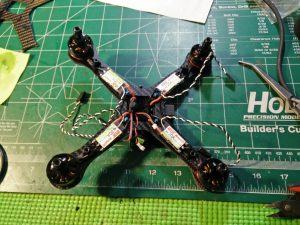
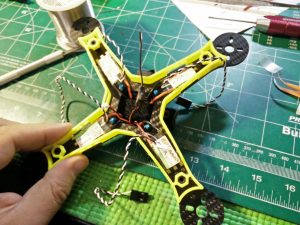
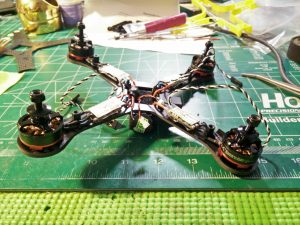
Sigan frames do not leave a lot of free space inside, especially the X140. ESC bigger than LB20A will likely not fit the arms. Expect to cut the motor wires and weave them around the support column in front of each motor. The kit includes a PDB and XT60 connector that solders on the PDB directly and is well covered and protected by the frame. The PDB barely has room for shortly trimmed ESC wires and an RX module. This is the most challenging part of the build.
I soldered two JST 1.25mm 2 Pin Micro connectors to the PDB – one for the FC VBAT, the other for the FPV pod. Alternatively these can be soldered to the ESC power cables too.
Flight Controller, Radio receiver
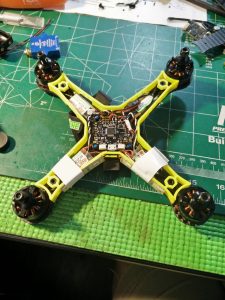
Flight controller access requires a center-placed USB port. There isn’t much room inside, so an FC without bulky ports and with built-in step-down is recommended. The RMRC Dodo is a great choice for F3, tho I managed to fit SPRacing F3, ripping the UART1 and I2C1 connectors from the bottom. Headers will not fit, so the rest of the wires will have to be soldered in. The SPRF3 requires 5V, I managed to fit a small Polulu near one of the ESCs.
FrSky XSR will fit (barely) under the FC, on top of the PDB. Spektrum diversity receiver will also fit if taken out of the box. The Furious Mini RX fits easy but requires electrical isolation (tape or heat-shrink)
FPV Pod
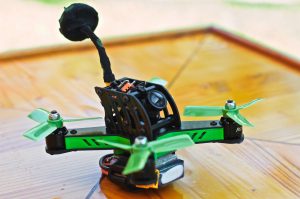
The FPV pod fits a standard HS1177 type camera. A small VTX will do best, TBS Unify is a good choice, especially as it already has a dongle, the ET600 also fits fine. I really like the pod design, it is easy to remove and 100% interchangeable between the builds. To keep it modular, I used a single micro JST connector with LiPo voltage connecting the pod with the base. Additional wires for OSD are just not practical, hence I chose the HS1190 camera with built-in OSD. However with careful hands, there is a little room in the pod for a 12v step-down, race transponder or even a micro OSD that only measures voltage.
Assembled and flight ready
Quick arm, motor-direction and failsafe test before putting the propellers. BLHeli_s sure makes the motors smooth. As a basic frame care, I also coated carbon edges around the motors and the FPV pod with some CA glue – this will prevent splintering after hard crashes.
X140 – 196 grams AUW (all up weight, with propellers, without HD and LiPo)
X190 – 302 grams AUW (all up weight, with propellers, without HD and LiPo)
Maiden flights
First impression – both fly fast, so fast! I credit the camera placement – high and back, and the aggressive tilt. I tried flying the micro in my yard, I was barely able to contain it, it feels much faster than my Shrieker despite having the same propulsion. Getting used to the camera required some practice on both quads and I am still adjusting to the tilt, especially during landing.
Unrelated to the frame, the X190 suffered troublesome first maidens. The first day it leaped violently and uncontrollably a few seconds after arming (luckily no injuries, always maiden with a finger on the disarm switch). It turned out the FC gyro was faulty, producing random sharp spikes. Day two revealed ESC de-syncs every other flip on different motors. I was starting to regret my XS20A choice. However flashing to BLHeli 14.8, keeping motor timing to medium, reducing starting power by half seems to have cured the problem entirely.
X190
X140
Conclusion
Challenge met and two great new builds added to my fleet. The frames and the kits are well thought out. If choosing which one to go with, I would recommend the X190, it is easier to build and fly. HD camera can be fitted on top of the FPV pod and both will carry it, however the weight will be very evident on the micro. The Creative DEX mounts are an excellent choice for mounting a GoPro. Francis also recently unveiled the Connex FPV pod that fits both frames, which will be a great upgrade once HD FPV is in the budget.
The X140 is an excellent micro, however like any in that class, it will have a much softer throttle response compared to a 5″. The weight/power ratio is just not the same. Where it falls short in power it will make up in agility, cornering on a dime and fitting though the smallest gaps with confidence.
I think I got lucky choosing the X190 components – they match so well, giving the quad a very light and responsive feel. Few days of flying and it is surely becoming my most favorite quad.
