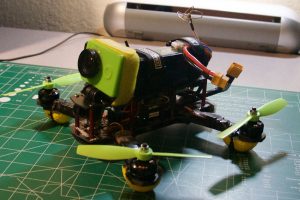
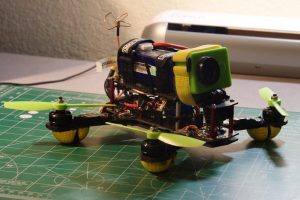
This is my third quadcopter build. Originally this was the first build of my good friend A. Farley, who was just getting into the hobby. Being his first build, some of the solders, wires and assemblies were not as clean as they could be. Eager to show off my 2-build experience, I offered to rebuild it. A week or so into it, I fell in love with the build and ended up trading my new Headplay HD set for it 🙂
The Headplay HD was nice, very big screen and hi-res and whatnot, but I was so used to the FS Dom V2, I did not care about anything else. My buddy hated his FS Teleporter V3 set but was really liking the Headplay, so we both considered it a trade-up.
With this build, I added a camera servo for the first time. It was a very simple idea, I arrived at from similar posts online, but it worked surprisingly well. More details below.
The Callaway practice golf balls are also a standard on my builds now. They are cheap, very sturdy and give the quad some extra height and bounciness. Big difference in both grass and concrete in my opinion. I don’t believe the shape or pits affect the flight characteristics in a noticeable way. I cut them in half with a tiny hacksaw and ziptie them underneath the motors. I’ve been flying/crashing this guy for few weeks now and never had to repair them.
Parts list:
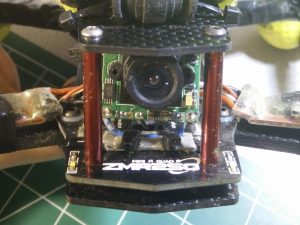
- Frame: ZMR V2 – high quality frame, especially compared to my Zax and Tangra builds. The arms are nice and thick. Holes and surfaces are machined cleanly. I like the PDB and appreciated the wiring simplification, especially with the MinimOSD. One complain might be that there isn’t much room for creativity, it is meant to be built more-or-less one way. http://amzn.com/B014FC03C8
- Flight Controller: Afroflight Naze32 Full – Same as Tangra, this is a solid board with a lot of flexibility. I like to configure 3 modes – Acro (my default), Horizon (for tricky LOS), and Horizon with MAG and BAR. The last is a kind of semi-auto-pilot, I can take my hand off the throttle/yaw stick. I use this mode to scratch my nose or sneeze 🙂 but also to let occasional bystanders “take over” and experience flying – it often blows their minds!
- Motors: Cobra CM-2204 1960kv Motor – as many mention online, those are meant for 4S. I tried them in 3S and they felt sluggish, but with an additional cell they totally bloomed. I love the sound – confident, contained yet aggressive hum. I fly them mostly with 5045 BN and they perform great.
- Props: DAL 5045 BN – another fly buddy recommended the DAL unbreakable. I got a set of their 5045 BN and wow – they live up to their names. Before I would often kill 8-10 Gemfans or HQs in an hour of flying. I am yet to break a DAL. Crash, flip, run into trees or gates, these bend but do not break. They also come nearly balanced which is a nice bonus.
- ESC: Lumenier 12 amp ESC w/ SimonK AutoShot (2-4s N-FET) (From GetFPV.com) Oneshot works great in Cleanflight. I am able to sustain loop time at 1200. These are small and easy to mount, just don’t try to solder directly on them. The heatsink or whatever else, made soldering extremely difficult. I burned one in the process.
The rest of the setup is nearly identical to my Tangra, see the link for parts comments and links.
- RC RX: d4r-ii with telemetry
- Video TX: Immersion RC 600mW 5.8GHz
- FPV Camera: RunCam PZ0420M-L28-R
- HD Camera: Xiaomi Yi
- OSD: MinimOSD with MultiWii firmware. One note on this one, I used a bare MinimOSD without the KV Team mod. I had to solder the battery meter directly on the Atmel chip. It is delicate work, and I mistakenly soldered it to the Video voltage meter. It still shows, tho a slightly annoying. I don’t know if I can change the MW firmware to compensate.
- LED Strip
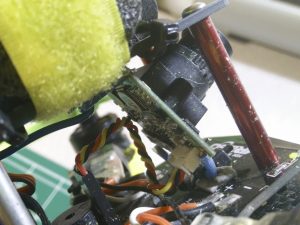
Camera servo – adjustable FPV tilt
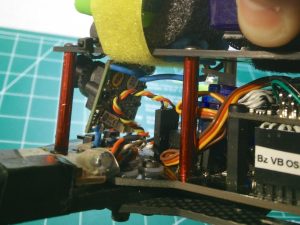
This is the first build I aded a servo to the camera. I used a tiny servo and rigged a basic hinge by soldering a thick wire on the bottom of the camera and fixing it to the frame with two zip ties.
On the top, I soldered another wire with a loop and another wire that hooked it and connected to the servo.
The servo is connected to one of the flight controller motor/servo pins and hooped up to one of the radio channels. On the radio side, I used a potentiometer at first, but then simplified it to a 3-way switch. Overall very simple but surprisingly sturdy, and by now, crash proven concept.
Flight videos
